Getting started with MediaFind
From a clean install to searching, asking and exporting your library — in about ten minutes. Everything below runs on your own Mac; nothing you index is ever uploaded.
MediaFind turns a folder of audio and video into something you can actually search — by meaning, by what's on screen, by who's speaking, or by just asking a question. This guide walks through it end to end. You don't need an account, an API key, or an internet connection beyond the first-run model download.
Try it now — interactive demo
Before installing anything, here's a hands-on sample you can click around right now. It's a small, freely-licensed library that's already indexed, so you can search by meaning, ask a question, jump to the exact moment, and browse people — without adding any media of your own.
Got the feel for it? Here's how to set it up on your own library.
1 · Install & first run
Download the app for your platform from the download page. macOS is signed and notarized; Windows, Linux, and the Android companion are beta builds and may show an OS install warning you can safely dismiss.
The first time you open MediaFind, a short setup wizard walks you through a few one-time choices:
- Welcome & ffmpeg check. The macOS app bundles its own
ffmpeg, so there's nothing to install — it just confirms decoding works. - Pick a transcription model. Choose a Whisper-class model sized to your machine:
tiny/baserip through a backlog,small/mediumare the everyday sweet spot, andlargeis for the hardest audio. You can change this later per library. - Pick an AI assistant model (optional). The on-device language model that powers Ask and summaries downloads once. Skip it if you only want search — everything keyless still works.
- Add your first folder. Covered in the next section.
2 · Add a folder — or try the samples first
Point MediaFind at any folder of audio or video. It handles the common container and codec formats and indexes what it finds. Add the folder again later and it indexes only what's new or changed.
Not ready to point it at your own files? On the welcome screen, “Try MediaFind on real videos” loads a handful of bundled, freely-licensed sample clips so you can explore every feature before adding a single byte of your own media.
| If you want to… | Do this |
|---|---|
| Test-drive the app | Click Try MediaFind on real videos to load the sample clips |
| Index your own library | Click Add folder and choose a directory of audio/video |
| Pull something off the web PRO | Use the Media downloader to fetch a public URL |
3 · Let it index — locally
Once a folder is added, MediaFind gets to work on your machine. For each file it transcribes the audio with word-level timestamps, embeds the transcript for semantic search, extracts keyframes, runs OCR on on-screen text, detects scenes and objects, labels speakers, and groups everything into chapters.
You don't have to wait for the whole library — files become searchable as they finish, and a progress indicator shows what's left. Indexing is parallel across files, so it scales with your CPU cores.
Get the transcript right once and every other feature — search, Ask, chapters, speaker labels — inherits the timing for free.

4 · Search your library — fifteen ways
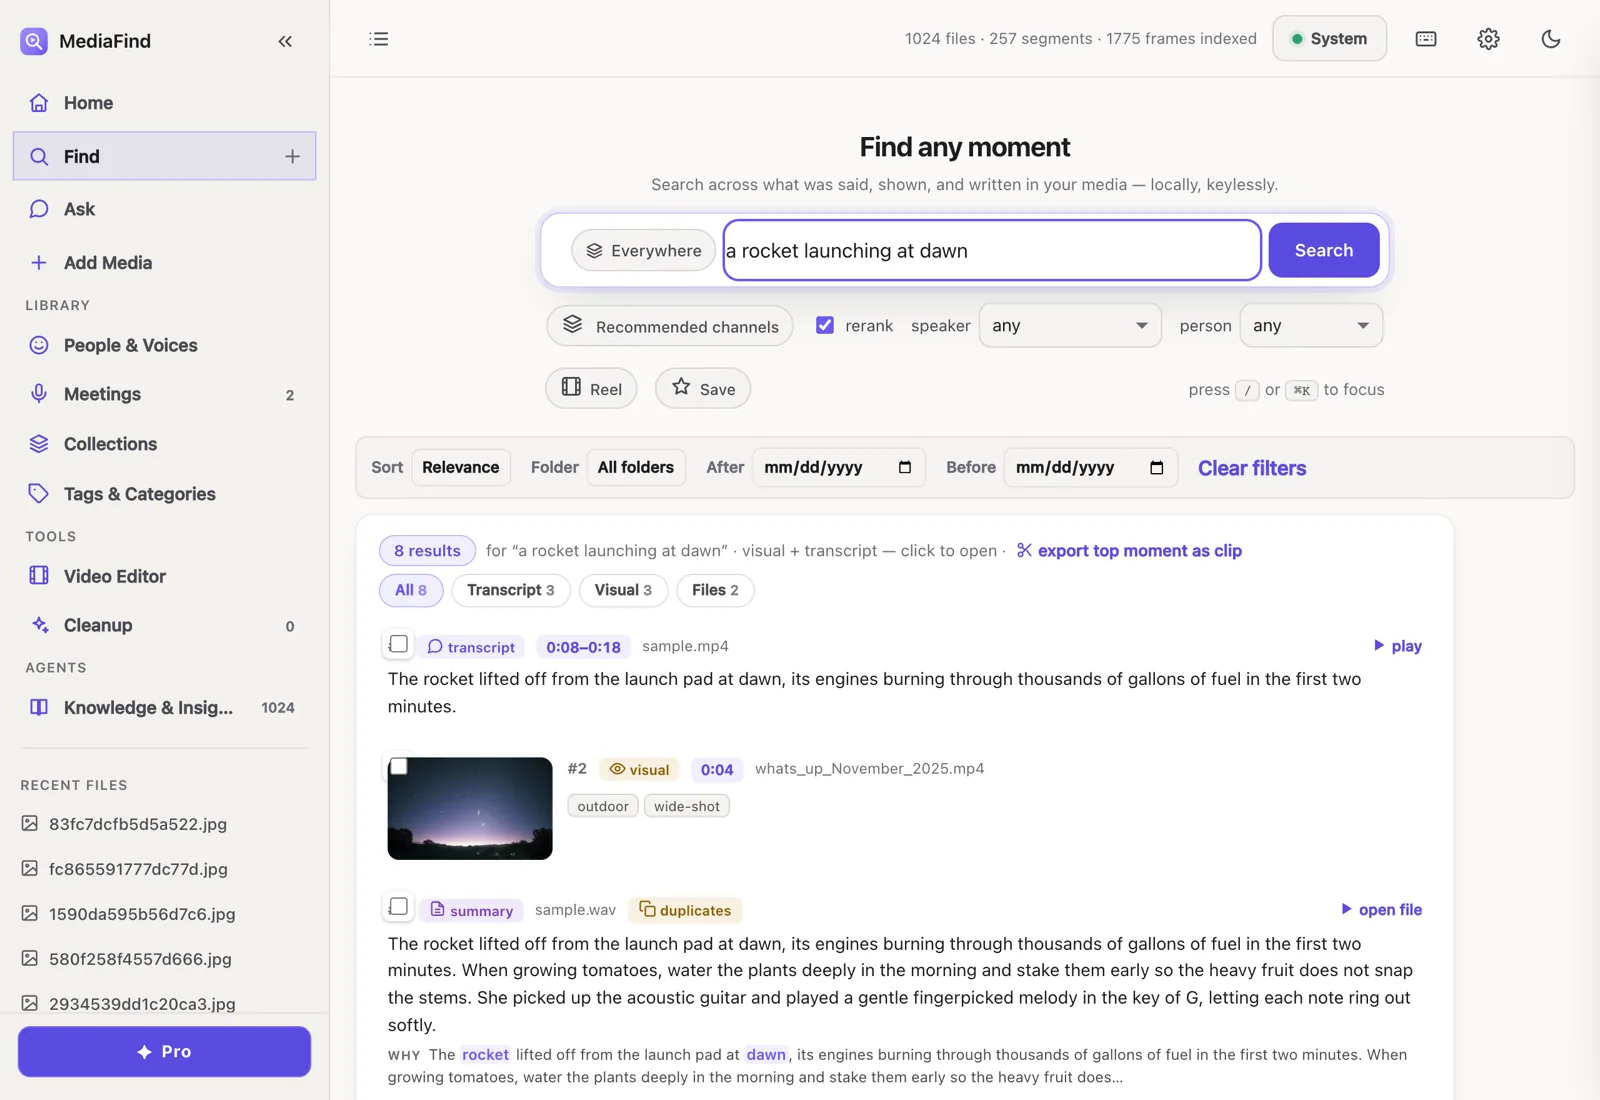
This is the heart of the app. Type a query in plain language and MediaFind ranks matching moments with exact timestamps. It searches by meaning, not keywords, so “the part where she explains the pricing change” finds the right clip even if nobody said those exact words.
The same search box reaches across many channels — pick a modality or let MediaFind blend them:
- Natural-language / transcript — semantic search over what was said.
- Visual & scene — CLIP search over what's on screen (“a rocket on a launchpad”).
- On-screen text (OCR) — find a slide, sign, or caption.
- Speakers — click a voice to see every clip where they talk.
- Color & reverse-image — find clips by a dominant color or a sample frame.
- Brand logos PRO — by name (“Nike”) or an uploaded logo image.
5 · Ask your library
Beyond finding clips, you can ask questions of everything you've indexed. The Ask assistant retrieves the few segments that actually matter, grounds a local language model on them, and answers — with citations that link to the exact timestamp. It's conversational and multi-turn, so you can follow up.
“What did we decide about the launch date?” → a grounded answer, with sources and timestamps you can click to verify.
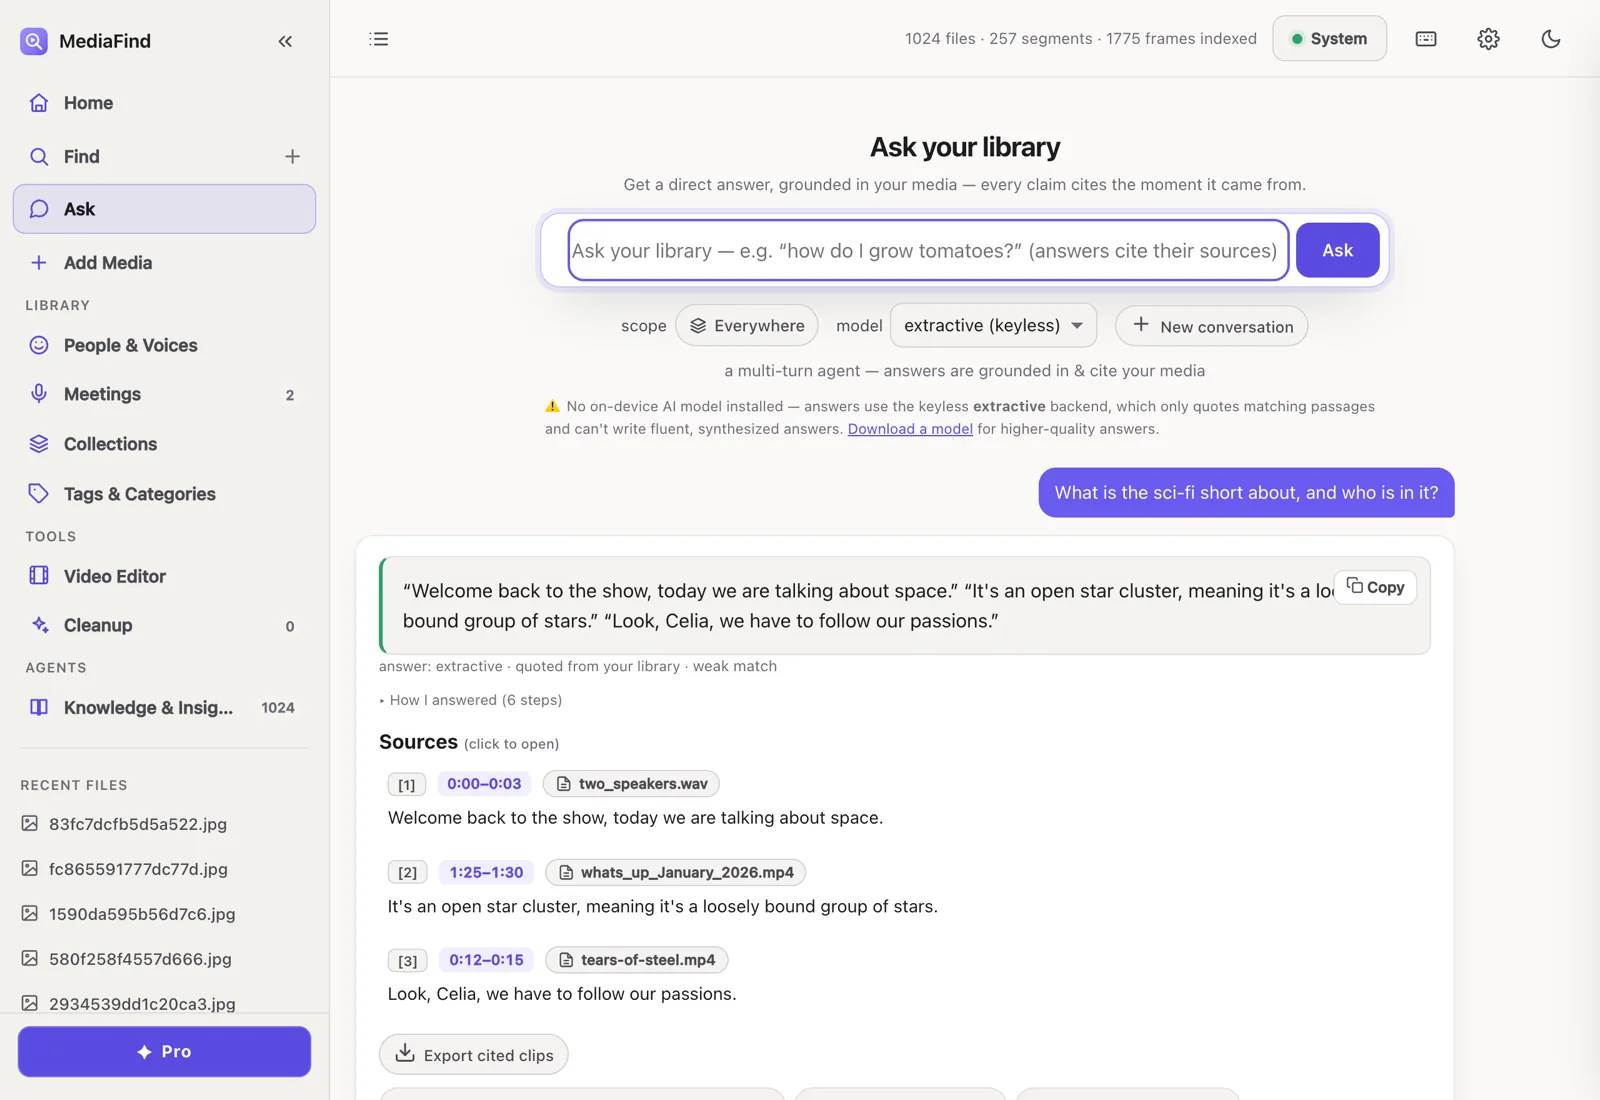
Like everything else, no prompt, transcript, or media leaves your machine. If you skipped the AI model during setup, Ask still works in a keyless mode and gets smarter once you download the assistant model from Settings.
6 · Jump to the exact moment
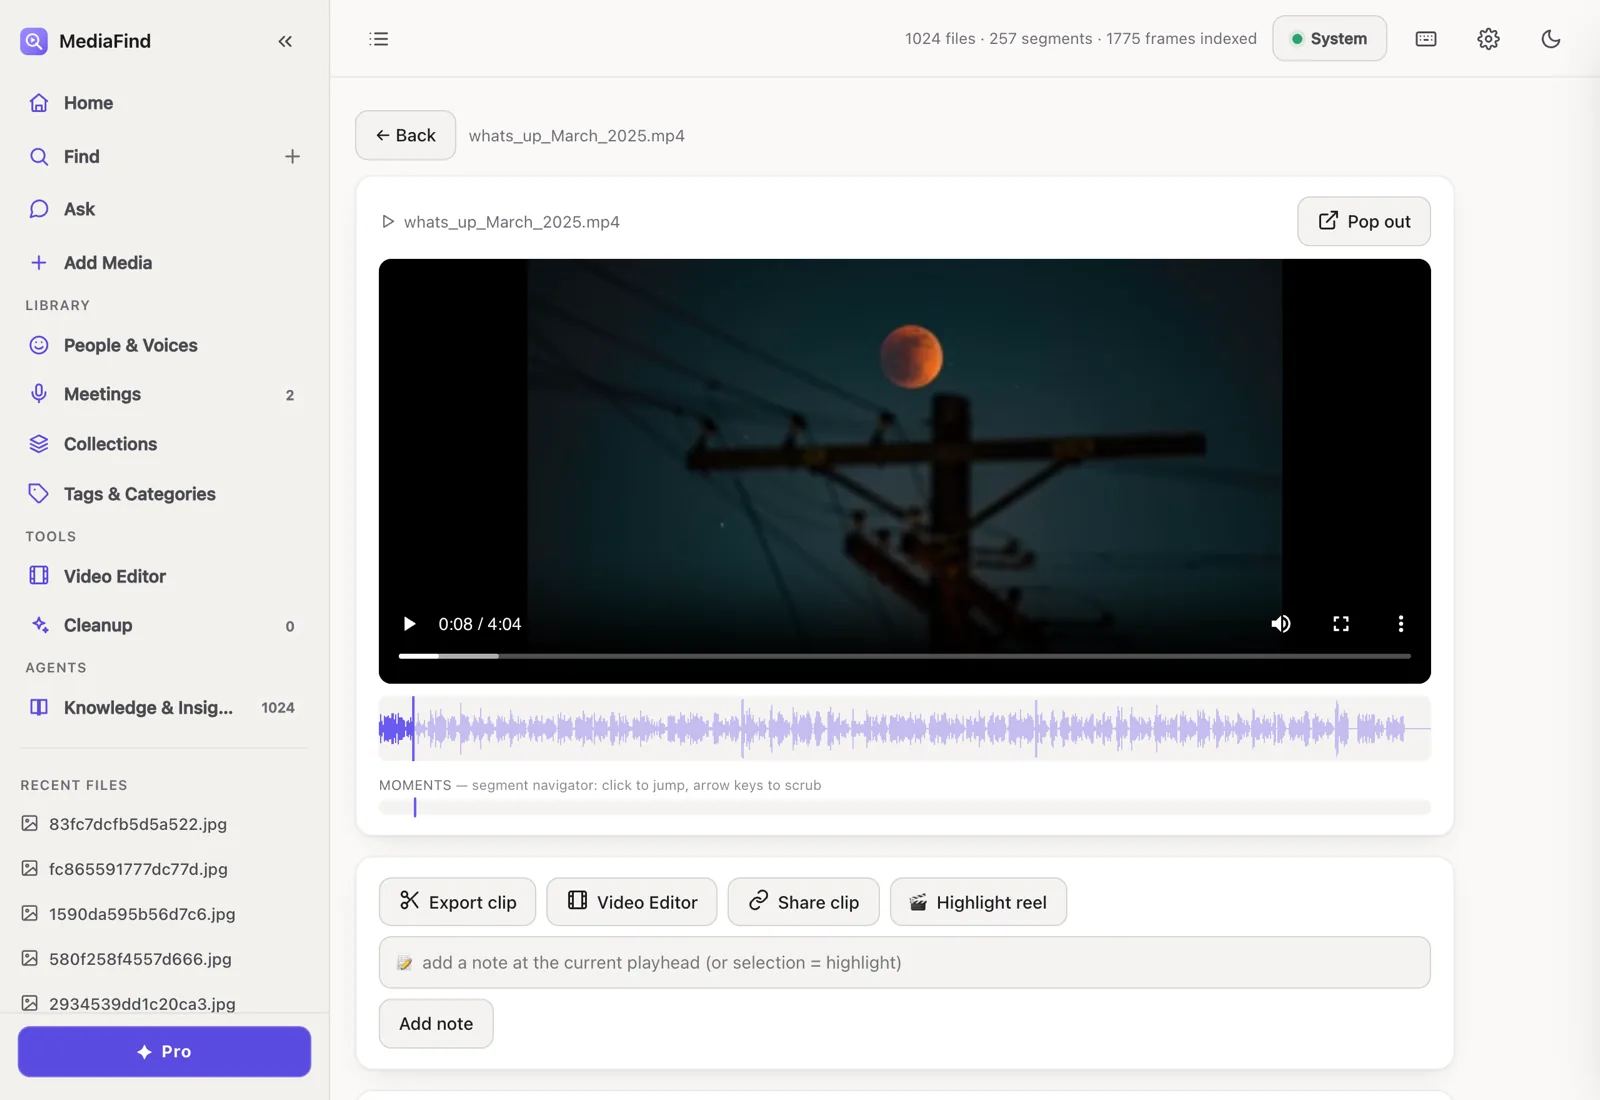
Click any result to open the player. The transcript scrolls in sync, on-screen text appears in its own panel, chapters let you skim a long recording in seconds, and the word-level timestamps mean playback lands on the exact moment — not “somewhere around there.”
7 · Export to your editor NEW
Found the moments you need? Select any set of results and export them as a timeline that opens directly in your NLE:
- Select the results you want from a search (use the bulk selection bar).
- Choose Export to editor and pick a format — FCPXML (Premiere Pro / Final Cut Pro) or EDL (DaVinci Resolve and others).
- Open the file in your editor. In/out points are frame-accurate, snapped to each clip's own frame rate, and each clip carries the text that matched.
DaVinci Resolve users can also send moments straight onto the current timeline via the bundled integration — no file shuffling.
Make it — Create NEW
Find locates the moments; Create assembles them. Open it from Create in the sidebar, under Tools; the Find ⇄ Create switch in Create's own top bar takes you back. The first run shows a short coach-mark tour, and you can replay it later from Take a tour on the Projects home.
- Start a project. Choose Blank project, New from a search, or From a template. Recent projects sit below; click the title to rename, or use the gear for sequence fps and resolution.
- Use the Bin. The left rail searches your indexed library live, so you can pull footage into a cut without leaving Create. Click or drag a Bin clip onto the timeline.
- Move through rooms. Create is organized by job: compose, edit, enhance, deliver, version, and queue work all stay inside the same local project.
| Room | What it does |
|---|---|
| Storyboard PRO Auto-Reel PRO Script PRO | The AI assembly trio: turn an intent into cited beats, rank highlights from a long source, or match narration lines to B-roll. Gaps are flagged; Create does not invent footage. |
| Timeline | Frame-based multi-track editing: add, split, trim, move, duplicate, ripple-delete, cross-dissolve, and undo. The Roll / Slip / Slide pro trims live in the trim panel. Editing is free. |
| Transcript Captions Audio | Edit by text, remove silences or fillers, keep one speaker, style captions, burn in or export SRT/VTT, translate on-device, set gain/loudnorm/ducking/fades, and add ducked music beds. |
| Reframe Text & Graphics Color Brand Templates | Convert to 9:16, 1:1, or 16:9 with face-aware Auto or Center crop; add titles and lower-thirds; apply bounded looks; reuse brand kits and project templates. |
| Deliver | Render MP4 1080p, MP4 720p, or MOV ProRes; create clip packs; repurpose variants for TikTok, Reels, Shorts, Square, YouTube, and X; export FCPXML/EDL or import FCPXML back. Render and packs are free (free degrades to 720p with a watermark); NLE interchange is PRO. |
| Versions Queue | Name snapshots, diff them against the current cut, restore with a pre-restore backup, and watch cross-project render, clip-pack, repurpose, and proxy jobs. Cancel or retry jobs from the Queue. |
Create stays local-first: projects reference files by path, can relink moved media by filename, and share the same on-device index as Find. No account or API key is needed for core work. Free mode degrades where it can instead of hard-walling: clip packs and repurpose jobs can render at 720p with a watermark and count cap. Pro-only actions show an in-app upgrade panel; Pro is a subscription with a 7-day free trial, and the license check works locally/offline.
8 · Browse people, brands & chapters
MediaFind auto-organizes your library so you can browse, not just search:
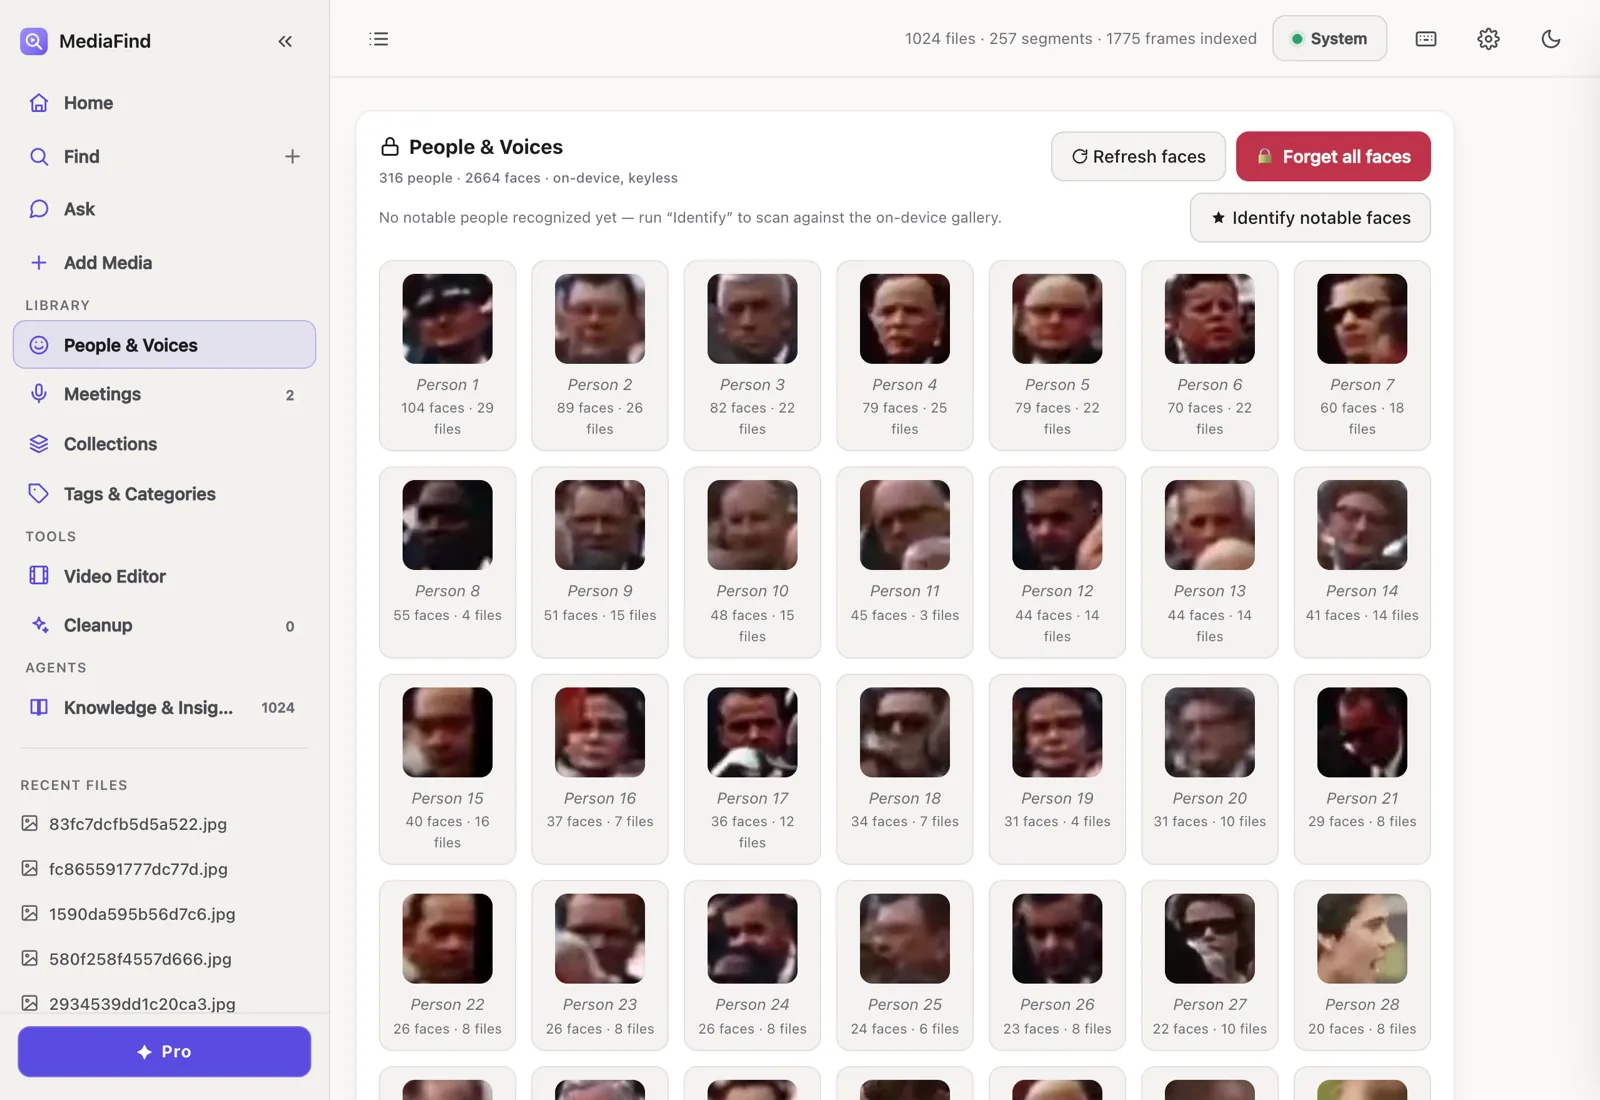
- People & faces PRO — an on-device face library, on by default for Pro/trial installs and off for free installs. Click a face to jump to every appearance; well-known public figures are auto-named with a ⭐. You can turn it off before indexing and wipe all face data with one click.
- Speakers — a roster of every voice; click one to see all their clips.
- Categories & knowledge map — zero-shot tags group your library by topic, with a knowledge overview of what's inside.
- Chapters & summaries — per-file summaries and auto-segmented chapters make long recordings skimmable.
9 · Built-in video tools FREE
The Tools section includes a keyless ffmpeg-powered editor — cut, convert, resize, compress, extract audio, grab a frame, or make a GIF — without leaving the app. The Mac, Windows and Linux apps include ffmpeg. Outputs land in your exports folder.
11 · Meetings mode PRO
Drop in any Zoom, Teams, or screen recording and MediaFind transcribes it on-device, extracts decisions and action items with speaker attribution, and makes every word searchable across your entire meeting archive.
- Auto action items. Every "you'll handle that" or "can you send…" surfaces as a named, timestamped task — no separate notes app needed.
- Search across all meetings. Ask "when did we last talk about pricing?" and get the exact moment across every meeting you've ever recorded.
- Stays on your machine. Your call recordings never leave your Mac. Transcription and extraction run fully on-device — no cloud, no upload.
10 · Privacy & your data
Everything above runs on your Mac. Your library lives in a local data folder — a SQLite index, thumbnails, and preferences — that you can open, back up, or delete yourself. The only network activity is opt-in and predictable: the one-time model downloads, license/update checks, and any public URL you explicitly ask MediaFind to fetch.
If you want to verify rather than trust, MediaFind ships a built-in privacy check that confirms the core path opens zero external sockets:
$ mediafind audit
✓ core path opened 0 external sockets.
Free to start, try Pro free for 7 days
MediaFind is free to try with no account required — enough to feel the whole workflow on a real project. Pro unlocks unlimited indexing and every Pro feature — People & Faces, Meetings mode, brand logos and more; see the full list — and starts with a 7-day free trial, then $9.99 for the first month and $24.99/month after, or $107.88/year ($8.99/month equivalent). Cancel anytime; the license check works locally/offline on your Mac.
Ready to make your library searchable?
Free trial. No account, no API keys, nothing uploaded.
Download for macOS